Vermont School Garden

A visit to a Vermont public school garden through the seasons.


2 Comments

Vermont Trees in Early Spring

It’s finally springtime in Vermont! The third graders at Westminster Center School are betting that the maple tree in the school play yard will yield some sweet sap for boiling into maple syrup. We talked about what the kids already knew about ‘sugaring,’ a Vermont tradition….that Sugar Maples yield the sweetest sap, that sap runs best when the temperature at night is below freezing but in the day is above freezing, and that it takes approximately 40 gallons of sap to boil down to one gallon of maple syrup. Half of the class had already had some memories of sugaring, but no one knew that a group of maple trees connected by lines for sap collection is called a “sugar bush.”

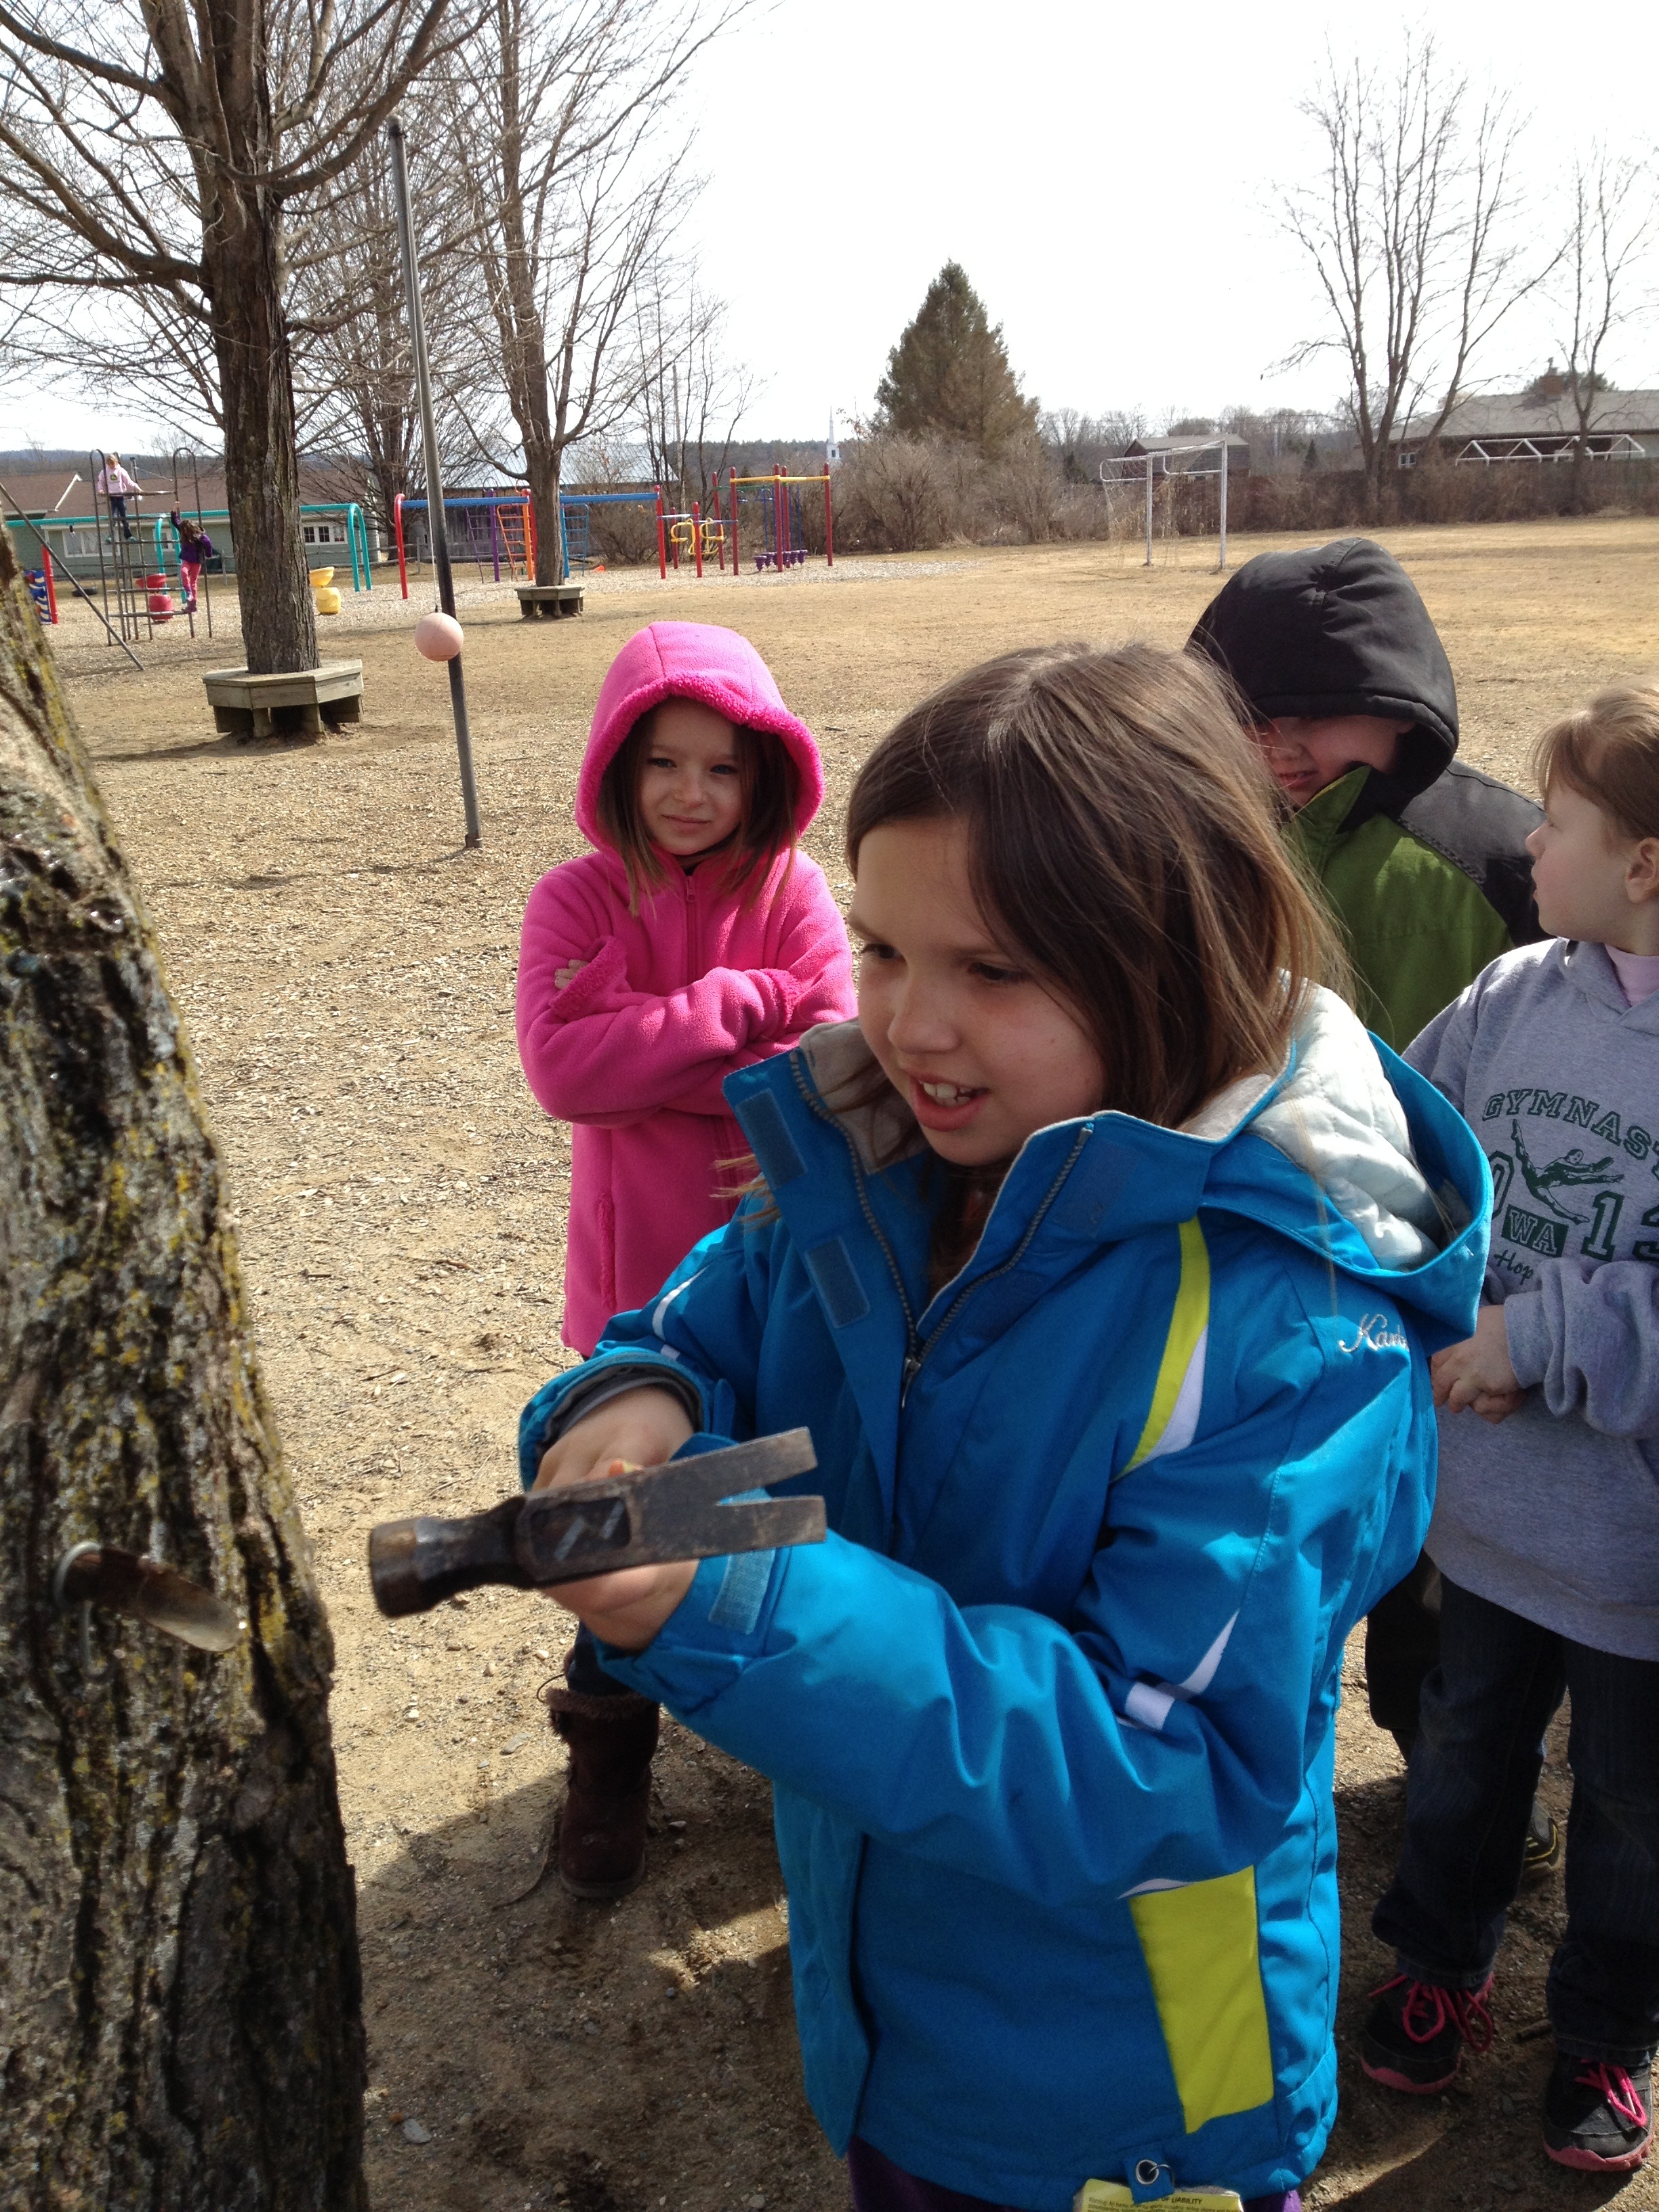
We drilled a 7/16  inch hole in the tree and we ‘set’ our taps by hammering a spout and  a hook into the tree trunk. Sap came pouring out before we could even attach the bucket! The students put one bucket on the side of the tree that gets a lot of sun and one on the opposite side. They wanted to test out their theory that the sunny side of the tree would yield more sap. We’ve rigged up an outdoor boiler, with the assistance of our principal, Mr. Tullar. He brought in a deep fryer from home. The students will record the process of sugaring next week. (MORE SUGARING NEWS TO COME!)

hammering tap

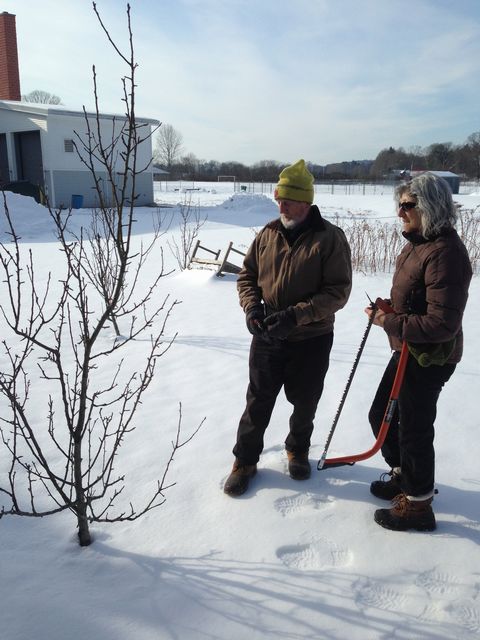
We have a true friend in Russell Allen, Orchardist at the Connecticut Valley Orchards  in Westminster. He regularly donates apples to our healthy snack program here at school. He has a grandson who attended school here and is now a Westminster farmer. This week Russell visited our garden to show me how to prune our apple and pear trees. He brought a small saw and some pruning sheers and a wealth of knowledge to impart about the care and nurturing of our small garden orchard. He is a born teacher.

He first drew an outline in the snow, the illustration of “a perfectly pruned tree. It looks somewhat like a Christmas tree………wide at the bottom and narrow at the top, with plenty of space between the branches,” he said. “But this is not a perfect world, so we’ll do what we can to make our trees look as close to this as possible.” The  trees were planted by a graduating sixth grade class about six years ago. To date they haven’t produced any fruit. Russell recommended that we fertilize some of them. Some trees didn’t need anything but pruning this year. Fruit trees  need a well balanced fertilizer,  primarily rich  in nitrogen. The ground around the trees needs to be fertilized as far out as the perimeter of the tree. I’ll get to that when the snow is gone. The tender trunks also need cuffs around them to protect them from gnawing rodents.

Russell left one Honey Crisp tree unpruned and pointed out that most of it had reverted to a wild state after years of neglect. There were about five main trunks in addition to the one that had been grafted to make the original Honey Crisp tree ( the scion).  “How can we make this wild tree into an example for the children to understand?” he wondered. “I know. Tell them that this is what would happen to you if you didn’t go to school to learn.”

IMG_0853IMG_0854

Advertisement


Leave a comment

Homemade Pizza in Kindergarten

summer tomatoes

Kinderarten harvestLast summer’s Roma tomatoes spent the winter in my freezer after they were harvested by the Kindergarten students in Valerie’s room. This month, I thawed them, still whole and unprocessed. I brought them to school along with some pre made pizza dough and a few other ingredients that make pizza taste like the kind you get at your favorite local restaurant….oregano, cheese, garlic, peppers..

I experimented ahead of time with the tomatoes, squeezing 3 cups of them into mush by hand, pouring off a little of the water, and then adding them to a mixture of diced onion, garlic and oregano that I had sizzling in some olive oil in a medium sized frying pan. When the tomatoes had cooked down to a consistency that resembled sauce (about 15 minutes), I used a wand to puree the ingredients. Voila!…. a fine looking pizza sauce. You could  use a blender or food processor.

I  made the pizza dough ahead of time. The dough requires 2 hours in a warm place to rise. (Recipe is included in this article.) You can also find ready made pizza dough in most grocery stores. I’ve even seen ready made crusts….just add your favorite toppings and fire up the oven!

The kids rolled out the pizza dough, grated the mozzarella cheese and cut up a green pepper. Then it was time to put the pizzas together! While they were in Art class, the pizza baked in a preheated 475 degree oven for about 20 minutes. Good book to read together while you’re waiting: “Pete’s a Pizza” by William Steig!

Many thanks to Valerie Kosednar and her K’s.

Hadley squeezing tomatoes

cutting peppers Valerie, Christopher

Grating cheese Meredith Ty

punching tomatoes Maya RhiannaJosh and Robert Kind. Tom.  sauce

assembled pizza

For a first hand experience, these Kindergartners made tomato sauce right in their classroom. Ooooh the giggles as they squished the tomatoes between their hands! I precut the onions and garlic. Those can be hard  for little ones to cut up. We cooked the sauce in a large pot on a hot plate, adding a little salt and oregano to taste. Then we froze it for a future cooking date. (Maybe spaghetti with our own garden tomato sauce?)

One Kindergartner’s reaction to our pizza: “Those peppers tasted so good they almost made me POP!”

It’s just about time to start tomato plants from seed for this summer’s tomato crop!

3 K's rolling dough for pizzacheese on pizza

Tighe and Christopher eating pizza copy

      pizza response paper

WHAT A SPRINGBOARD THIS LESSON WAS FOR ENCOURAGING KINDERGARTENERS TO WRITE! THEY WORKED HARD FOR TWO DAYS AT LABELING THEIR PICTURES WITH THE BEGINNING, ENDING AND MIDDLE SOUNDS THAT THEY COULD REMEMBER. THEY HELPED EACH OTHER WITH THIS WRITING ASSIGNMENT.

Homemade Pizza Dough Recipe

(makes one average-sized cookie sheet pizza)

4 cups flour                        1 Tablespoon yeast

1 1/3 cups warm water          1 teaspoon salt

2 Tablespoons olive oil           ¼ c. cornmeal

1.Dissolve yeast in water

2. Add salt, and olive oil and stir. Then slowly add flour until dough is soft but not sticky

3. Knead dough on a clean floured surface for 10 minutes.

4. Let dough rise in a warm place for about two hours.

5. Using more flour as needed, roll the dough out on a flat surface and fit it to the pan.

6. Oil pan and sprinkle with corn meal, then add dough, adjusting it to the edges of the pan

7. Add your favorite sauce and toppings.

8. Bake in a preheated 475 degree oven